Young foodie living in London- blogging about food, wine and life. Follow my journey of discovery in this great city and beyond.
Showing posts with label Recipe. Show all posts
Saturday, 14 January 2012
Easy Recipe- Mozzarella di Bufala Campana with Roasted Fennel
Ingredients:
Serves 2
250-400g Mozzarella di bufala Campana (depending on appetite)
2-3 bulbs of fennel (depending on size)
Olive oil (extra-virgin for dressing but standard will do for roasting)
1/2 tsp fennel seeds
Sea salt and freshly ground black pepper
Just a quick little something that you can put together in not too long and instantly feel like you've been transported back to the heady days of last summer when the daylight was plentiful, the weather was lovely (sometimes) and everything felt a little bit easier than it does right now, here, in the depths of the ever so dark winter.
I absolutely love Mozzarella and in particular that which comes from the milk di bufala (buffalo, for the non-Italian speakers). The combination of rich creaminess and lactic tanginess combine to create what must surely be one of the greatest cheeses that Man has ever managed to create.
The word mozzarella is applied to what are, in reality, very different types of cheese. Ranging from the bland pre-grated type that you can get for sprinkling on pizzas, to the small milky balls of cows' milk cheese stored in whey, most commonly found in supermarkets. Well, aside from similarities in production, Mozzarella di bufala Campana is a whole different product all together. Well, in my eyes at least.
The Campana part refers to the DOP (controlled denomination) on the product meaning that one can only call and market your product as Mozzarella di bufala Campana if it is made in the Campania region of Italy. With family roots in this very area of Italy (near Napoli to be more precise) I have long been aware of its capacity for amazing food production; this glorious cheese is no exception.
The cheese is made entirely of buffalo milk which is richer than cows' milk and so imparts a more buttery flavour. The mozzarella I bought came in a plait, but it can also be found shaped into balls, cylinders and little bites known as bocconcini. The skin on the outside should be a brilliant white, with the inside always slightly less so. In texture, it's slightly springy but also should have a very "melt in the mouth" quality. Taste wise, the best will be milky as well as having the crucial slightly sour, lactic tang that elevates it to a whole new level of complexity. The cheese is actually created by heating to separate the curd and whey before the curd is then stretched using a process that the Italians call pasta filata. This involves kneading the curds almost like a baker with bread dough until the there is a smooth consistency.
Nothing needs to be done to the mozzarella except to tear it open so that it forms a bed on which to place your fennel. The quality of the mozzarella, of course, dictates the quality of your meal, so really do shop around and try and find a really high-quality one. Try specialist cheese shops or Italian delicatessens. I got mine this time from Lina Stores in Soho.
Remove your mozzarella from the fridge a while before cooking. The best way to enjoy it is roughly at room temperature. Now prepare your fennel bulbs simply by chopping off the stalks at the top and the base at the bottom. Also remove any hard outer layers. Now chop the fennel into the size of pieces you desire. In the picture, I cut quite small pieces but it's easiest to just quarter them . Cover them in olive oil, salt, pepper and a sprinkling of fennel seeds. You could also try adding some finely chopped chilli if you wanted but I didn't want the heat to over power my mozzarella which is really the star of the show.
Place them in a baking tray and into a preheated oven at 200c/400f/ gas mark 6 for about 30 minutes. Cover them with foil for this time before removing it and leaving for another 10-15 minutes. If you're pieces are smaller you should reduce the cooking time accordingly. Try to keep an eye on your fennel because although the roasting really does a lot to sweeten the aniseed flavour, a minute too long and they can over cook and taste burnt and unpleasant.
Once cooked, remove from the pan and sit on top of your cheese before drizzling some extra virgin olive oil on top. Maybe serve with some crusty Italian bread and/or some roquette.
Pretty simple. Pretty delicious.
GastroTom
Follow me on Twitter- @GastroTomBlog twitter.com/GastroTomBlog
Thursday, 12 January 2012
My very own Roma(u)nesco World Heritage Site
| The Romanesco or Roman Broccoli |
Sorry for the terrible pun, but after seeing the pictures I took of these wonderful vegetables, it struck me that they indeed looked like a kind of alien, Giger-esque interpretation of the great pyramids of Giza. It may sound a bit much for some of you, but I am really looking forward to eating these for my dinner tonight. Yes, such joy and anticipation about a vegetable! Well, we're not children anymore are we, and surely there are plenty of greens that we can now get enthusiastic about.
The vegetable pictured, I should add, is Romanesco Broccoli. Mine are miniature versions of the usual full size ones you'll more easily find in shops. Although it's often called "broccoli", including by me, it's actually a variant of the cauliflower. I personally call it a broccoli because I think it more closely resembles it in flavour although I concede that the texture is closer to cauliflower.
However, if you're not keen on either of those two much maligned, don't recoil in horror because Romanseco is actually miles better in both texture and flavour. It's creamier and nuttier than your garden variety cauliflower and broccoli. It's also less bitter and more tender. You should be able to pick it up at some good specialist greengrocers and I know bigger Waitrose stores are currently stocking it. I was originally inspired to go out and get some when I saw Nigella Lawson tweet a picture of some, which I could see was in Selfridges' Food Hall, so I know it's available there too.
It is thoroughly delicious just prepared like you would with broccoli (although be careful not to do to it what far too many do and cook it into squidgy oblivion) but it's probably even better if you then toss it with some olive oil, sautéd garlic, salt, pepper and Parmigiano Reggiano. Wonderful!
GastroTom
Follow me on Twitter- @GastroTomBlog twitter.com/GastroTomBlog
Wednesday, 11 January 2012
My Epic Trencher
Follow me on Twitter- @GastroTomBlog twitter.com/GastroTomBlog
After seeing this dish being prepared on Channel 4's new cookery and baking programme The Fabulous Baker Brothers, I just had to have a go at it myself. It was great to not have to stand over the cooker for ages after a long day, but still end with something thoroughly delicious.
The full recipe can be found here, but the method really isn't overly complicated. That's not the point of this dish- it's all about simple, gutsy flavours and letting the quality of your ingredients (especially the steak) speak for themselves.
You'll need a loaf, preferably sourdough to make the trencher base. A trencher, by the way, is the base of a loaf bread which is used as the plate. This dates back from medieval times, when it was normally stale bread which was merely for function and not flavour. The trencher would normally be given to the poor after the meal, but I suggest you eat the bread with this one; so make sure you pick a decent loaf. By the way, I would still thoroughly encourage giving to those less fortunate, it's just your donation might be better in money than your leftover baked goods.
You'll also need a hanger steak which gets it name because it is the muscle that hangs between the rib and the loin of the cow. It is actually made up of two v-shaped muscles with a thick piece of sinew running down the middle. Ask the butcher to remove this and butterfly it for you.
Fry your well-seasoned steak for 2 minutes on each side. You really don't want to cook a cut like this any more or it will start to become tough. Definitely not one for people who like their steak well done. You want the pan really hot so that you get a really loud sizzle in the pan like on the video I took.
Add some butter right at the end of cooking and baste the steak with it and then put the steak onto your trencher. Wrap the whole thing in foil. Then chop up some mushrooms (I used portobello) and sauté in butter along with some chopped garlic. Prepare a salad of watercress, parsley and finely chopped shallot. Once the mushrooms are cooked deglaze the pan with sherry vinegar and add to the salad.
Now all you need to do is unwrap the steak which should be nicely rested and slice it. You'll notice that all the liquid that would normally end up on the plate has soaked into and flavoured the bread. Place it on the trencher and then top it with the salad and mushrooms. There you have it. Absolutely wonderful and pretty straightforward. This served two people when I did it but if you don't have big appetites, it could probably stretch to three.
As for the programme, I found it very entertaining and fun. The perfect companion to the new Heston Blumenthal programme which precedes it. One with very achievable recipes, the other ever-so-slightly more challenging. Both very rewarding and most importantly, very tasty. The two brothers are surely major food television personalities in the making.
(Recipe from The Fabulous Baker Brothers, Channel 4- http://www.channel4.com/4food/recipes/tv-show-recipes/the-fabulous-baker-brothers-recipes/epic-trencher-recipe)
You can catch-up here with the programme here on 4OD- http://www.channel4.com/programmes/the-fabulous-baker-brothers/4od
The Ginger Pig- http://www.thegingerpig.co.uk/
GastroTom
Follow me on Twitter- @GastroTomBlog twitter.com/GastroTomBlog
Sunday, 8 January 2012
Recipe- Chocolate Fig Bonbons
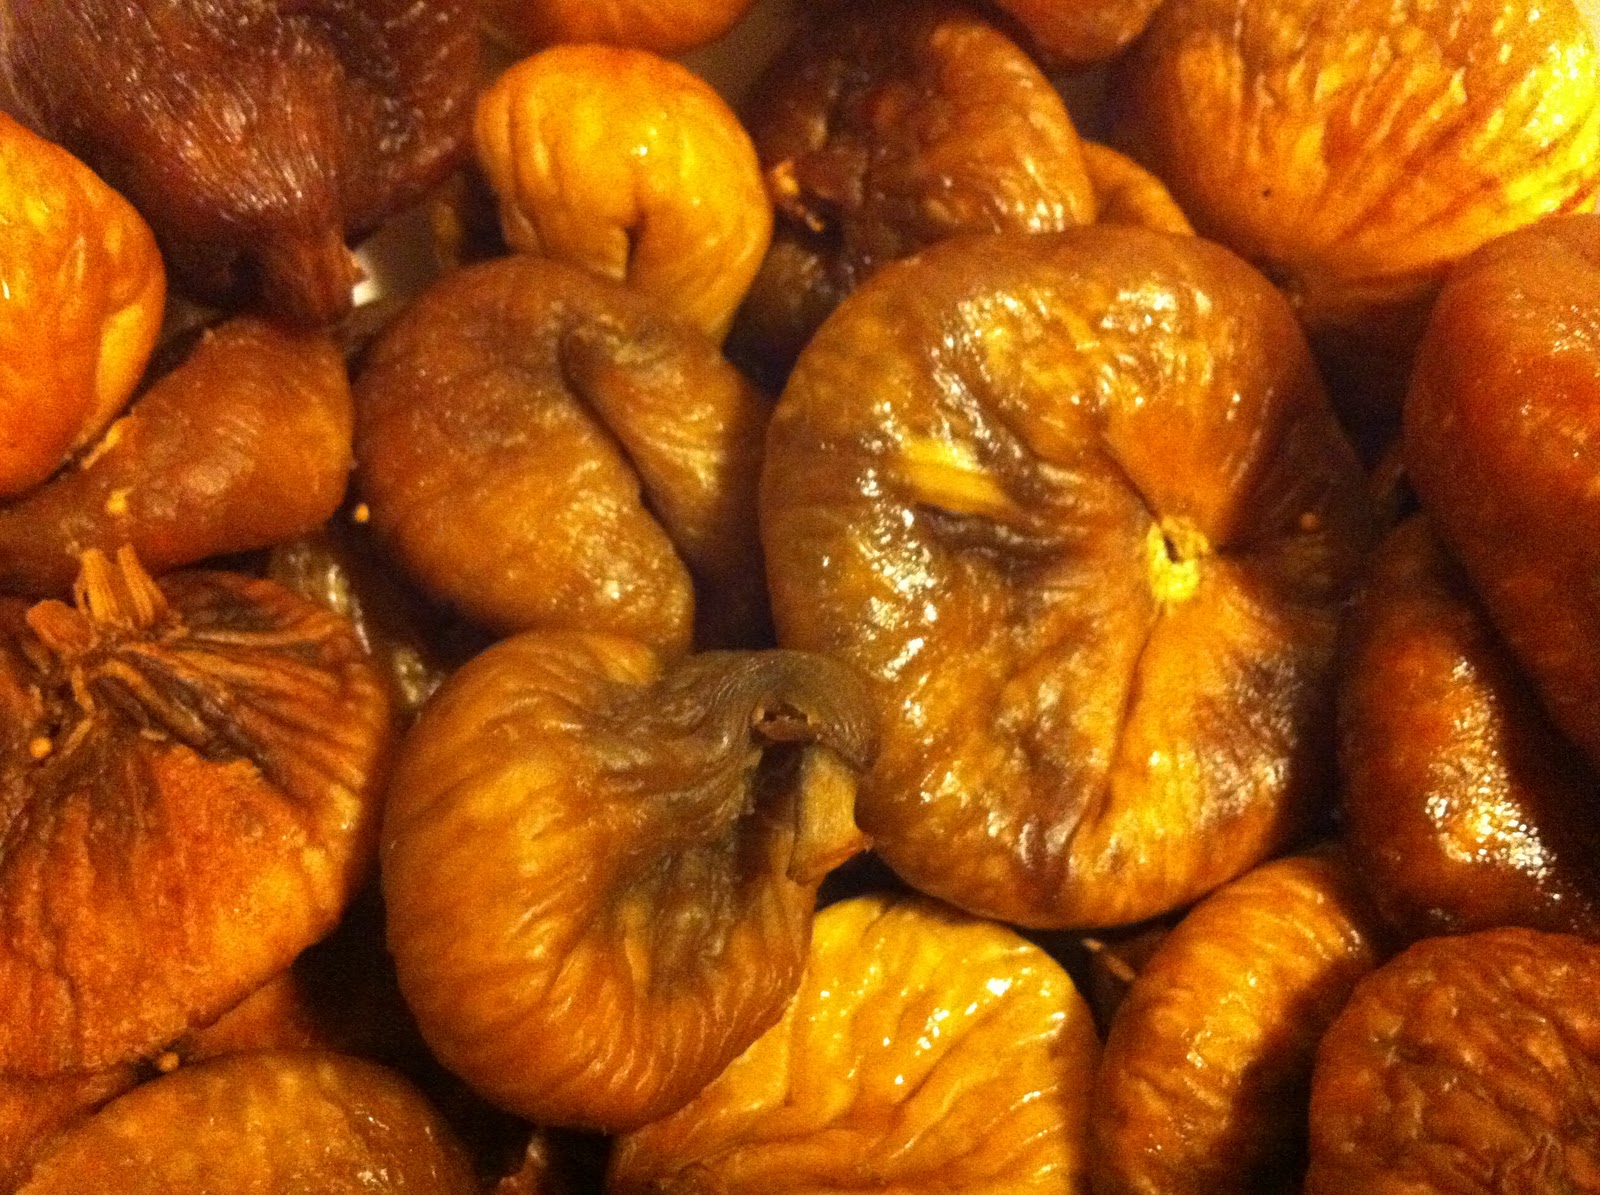
After having tried two different types of chocolate-covered figs over the Christmas period, I was inspired to try making my own simple version. These are rum-soaked chocolate fig bonbons and delicious they are too.
To make 10:
10 large dried figs
250ml golden rum
125g chocolate
Try and find the biggest, highest-quality dried figs that you can. The juicier they are, the better.
Place the figs into a bowl, preferably wide based enough so they are not all sat on top of each other.
Take the rum and pour over the figs so that they are completely immersed in the liquid.
I used Mount Gay Rum. This golden rum is distilled in Barbados by the Mount Gay Distilleries which has a surviving deed dating from 1703. This makes it the oldest rum brand in the world.
It has a rich, golden colour and has a very clear caramel nose. There is a reasonably sweet flavour on the palate which balances out the high alcohol content (40%, 80 proof) which is standard in rum.
Don't worry if you feel like you're using too much, because you'll be left with a fig-infused rum at the end, which would be perfect for cocktails (a suggestion will follow soon).
It is best, both for the figs and the rum that you will have left behind, to leave them soaking at least over night so that the flavour of the rum can fully infuse into the figs and plump them up nicely. Cover your dish with cling-film to prevent evaporation of the liquid.
Take a pan and a glass bowl that is large enough to sit on top of the pan.
Fill the pan with water, ensuring the water will not touch the bottom of the bowl, and bring to a gentle simmer before switching off the heat. Sit the glass bowl on top.
I used half 40% cacao and half 70% cacao chocolate to create a balance but some people are very purist about using solely chocolate with a very high cacao content and there is no reason not to stick by this. If you're completely averse to dark chocolate, you could feasibly just use milk, but I personally wouldn't recommend anything weaker in cacao than the combination I used.
Break up the chocolate into small pieces and place them in the bowl. Allow the chocolate to melt slowly being careful to not get the water too hot. While the chocolate is melting, drain the rum from the figs and pat the figs dry.
Carefully cover the figs in the melted chocolate. I found the best way was to put a fork through the stem of the fig before dipping it in the chocolate and then pouring more chocolate over the top to ensure full coverage.
Now place the figs onto a greased plate or greased parchment paper and place in the fridge to set.
After a few hours, the figs should be fully set and ready to eat. You should find when you bite into one that the figs are juicy, rehydrated by the rum. They will also have a reasonably strong flavour of the rum meaning that these bonbons are certainly best eaten as an after-dinner treat.
All in all, they make a delicious, boozy chocolate that's really easy to make. Give them a try and tell me what you think.
GastroTom
Follow me on Twitter- @GastroTomBlog twitter.com/GastroTomBlog
Thursday, 5 January 2012
The End of a Baguette
That old problem of opening the kitchen cupboard and discovering the pesky little end of a baguette. The bread is too good to just throw away but what can you quickly do to it that will make you a tasty light lunch?
How about toasted sourdough baguette with goat's curd and pea shoots, drizzled with Kalmata extra virgin olive oil?
Well, as simple as this solution might be, I just enjoyed it myself for lunch and I certainly wasn't left wanting.
Take the end of your baguette (or indeed a middle part if you're lucky to have more left) and slice in half. Place under the grill until lightly toasted.
Spread the goat's curd liberally onto the bread.
Season with sel de Guerande and black pepper.
Top the bread with a sprinkling of fresh pea shoots.
Finally drizzle with an extra virgin olive oil.
I was lucky that my end of baguette was more specifically a delicious white stick from the St. John Bakery who have their bakery just down the road from me on Druid Street, Bermondsey. I was similarly blessed that my goats curd was produced by Neal's Yard Creamery, an independent dairy producer based in Dorstone, Herefordshire.
I also used a PDO Kalmata Extra Virgin Olive Oil from Waitrose which was golden and peppery and added greatly to the overall balance of the dish. And my pea shoots, I was pleased to see, were grown in my home county of Yorkshire and tasted fresh and sweet. Perfect to cut through the goat's curd and bring a bit of balance and green vibrancy to the dish. I suppose some would say you should really remove the stems from the pea shoots but with this, I enjoyed the crunchy element that they brought and so left them as I found them.
Ready in five. Enjoy!
St. John Bakery- http://www.stjohnbakerycompany.com/
Neal's Yard Creamery- http://www.nealsyardcreamery.co.uk/index.html
GastroTom
Follow me on Twitter- @GastroTomBlog twitter.com/GastroTomBlog
Subscribe to:
Posts (Atom)